Saturday, December 20, 2014

Simplicity 1419 - The Russian Wodka Dress

I used to really like the Lisette line of patterns for Simplicity.  The first collection was like an adorable exercise in coordination--the colors, the fabric swatches on the envelopes, the little names they all were given.  But then I actually made some (the Passport dress and the Portfolio tunic, if you must know).  The early ones almost uniformly lacked bust shaping and ended up being kind of unflattering for someone like me.  Simplicity 1419 changed all of that!

For this dress, I added an FBA and some extra waist darts (bringing me to 4 in the front) for the proper fit, then changed the skirt to the formula I like best.  It has two inverted pleats at the front, which usually are placed directly underneath the waist dart, and either small pleats or gathers at the back.  On this particular dress I used pleats.  Made this way, the skirt has a nice flat front which I prefer to one with fullness all the way around.

Checking on cookies.  You mean to say that you don't do Industrial Christmas Baking dressed like this??
 The fabric is Russian vodka, circus, ballet, and flag print which is definitely a little unusual for me!  I tend to stick to solids or small florals, and leave the crazy prints to my sister, but I had my eye on this fabric for years and finally decided to pull the trigger a couple of months ago.  I'm so glad I did because it's got a hand like buttah and a drape like silk--all while being easy-care rayon.


It looks like there's a line of stitching above the waistline seam, but I think that's a crease in the fabric from where I had the apron tied a bit snugly earlier.  


I cut a size 14, but did a 3-inch FBA and took out additional width in the waist with an extra dart.  I think the back ended up being a size 12.  This pattern definitely runs a little bit big!


I swear, this kitchen has the worst lighting ever.  But the best ovens!


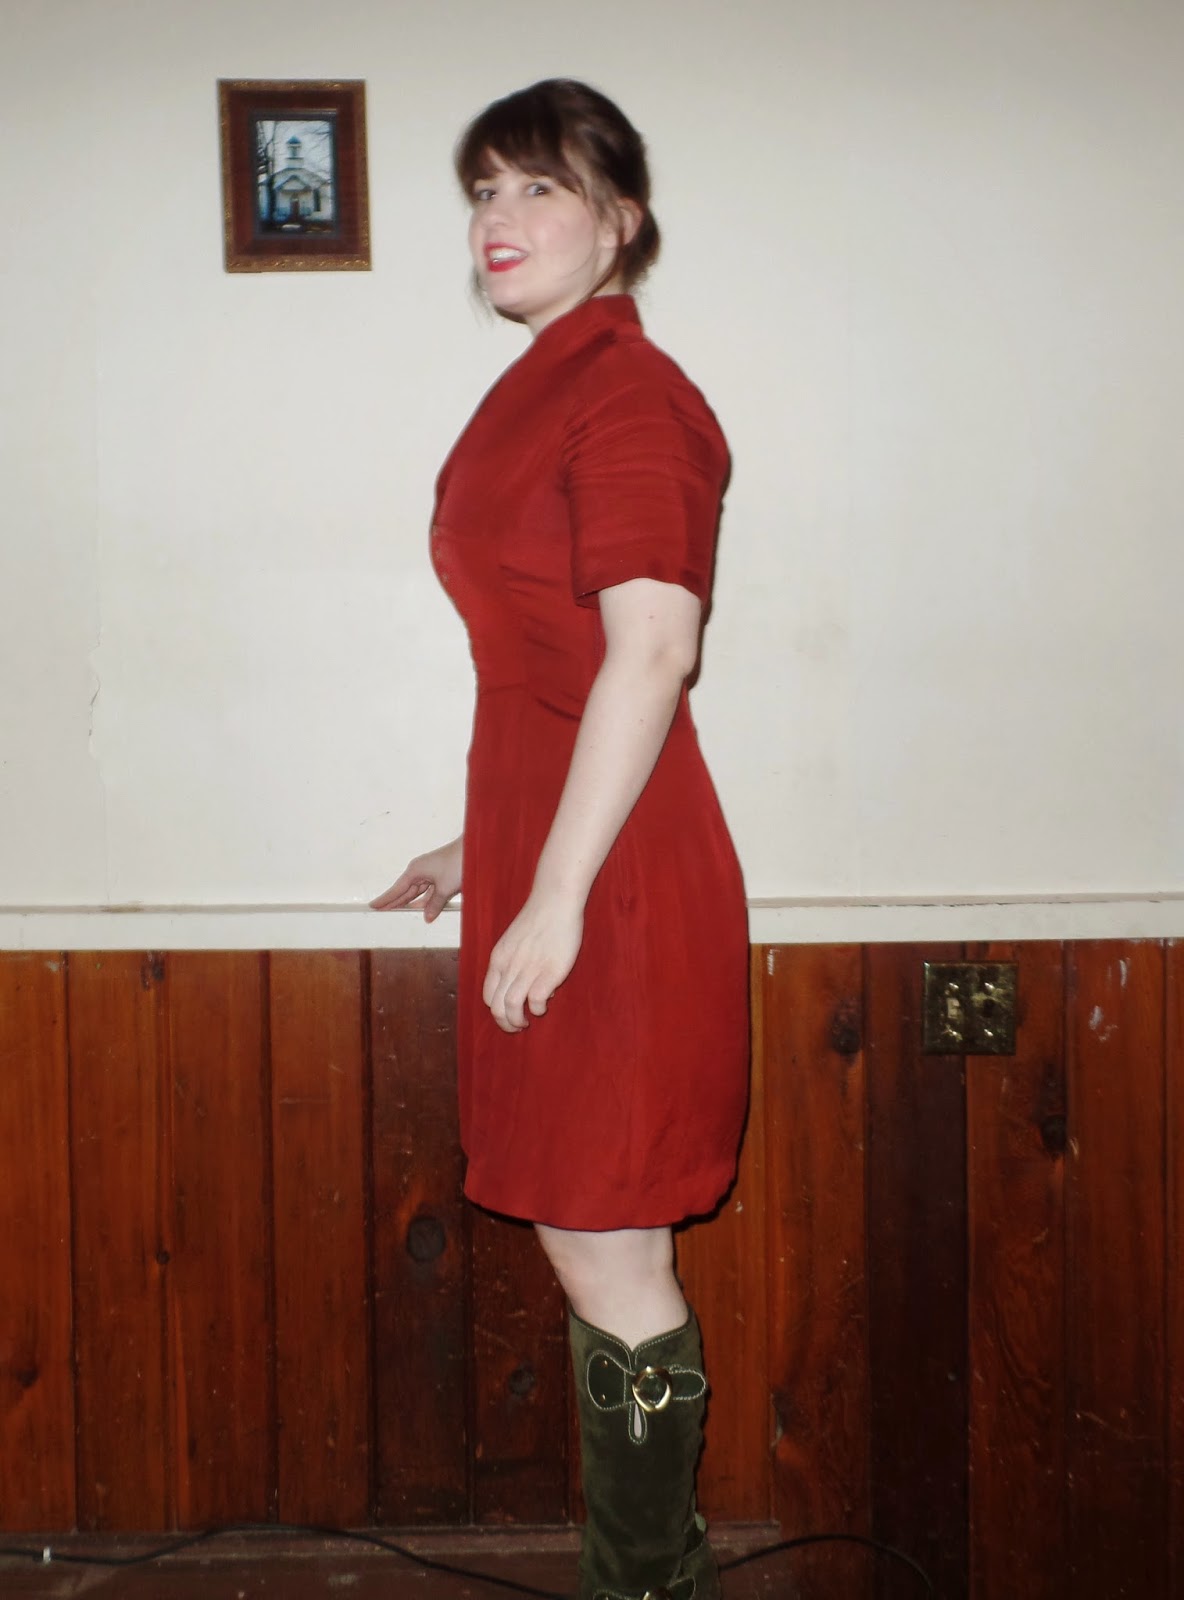
From the side you can see the sleeve I modified.  The pattern's original cap sleeves were not my cup of tea.  At all.  Originally, I thought that a puffed half-sleeve with darts at the bottom, like a mini leg o' mutton would be nice instead, and give me a bit of coverage in the winter.  Nope.  Frumpsville.  In a fit of frustration, I cut two inches off the bottom, hemmed it, and then gathered the bottom 3-ish inches at the outside and sewed a little self-bow on top.  It's twee, but it suits the silly print!

I welcome any suggestions, critiques, advice-s, etc!  Thanks!

Thursday, December 18, 2014

Burda 08/2014 #112 Or, Not my finest hour

From BurdaStyle's August 2014 issue come these pink knickers.

Since making them in September, I've worn them only twice.  I loved them in the magazine and perhaps overestimated how flattering the early-20th-century-newsboy look would be on me.  They are supremely comfortable and kinda kicky, but I can't help feeling enormous in them. And that's after shaving a good two inches out of each leg (which explains why the pleats don't close)!  Originally they were absolutely billowy, even in the weighty polyester/rayon crepe suiting I chose.

I was hoping to look like this:


But it came out a little more like this:

The buttons are rather pretty faux-horn which I took off of a baby-sized trench I bought at the Salvation Army for that purpose.

This was my first attempt at a fly zip, and while it's not entirely even, I'm not unhappy with it.  I tried to rip it out and do it again, but soon realized that a permanent mark would be left from the previous line of stitching.


This is the leg opening.  After the disaster that was the waistband buttonhole, I decided to just go with loops.  And never sew with this particular type of fabric again.


Here you can see just how high the rise is, as well as my zipper!  Um, these will never be worn with anything tucked in.


 The back view.  Part of me loves them, and part of me just thinks that they give me old-lady pancake butt.


I really like them from the side! 
In all, I'm happy that I made these, because I learned how to do a fly zipper opening (although I definitely need some more practice) and also because I think they are a bit fun, especially for lazy days spent baking/decorating or picnics at the park, or any other time I don't necessarily have to look my best, and don't want to wear a dress.  


This picture is just gratuitous.  I accidentally set the 2-second instead of the 10-second timer on the camera--then ran in front rather than just let it go.  I think it's the funniest picture of me, double chin, Febreeze and all!

Monday, December 15, 2014

Burda 6832 - Rust

When the new Autumn 2014 Burdas came out, I had my eye on 6830, but since Jo-Ann's decided to have a sale almost immediately after they were released and that never happens, I grabbed Burda 6832 as well, just because I love unusual collars, princess seams, and fake buttons.

I'm very glad I did, since I've made two versions already during this semester (how I measure all time), using both variations.  The first is made from a rayon/linen blend from (where else?) DenverFabrics.  I didn't love the color when I first saw it as I thought it was going to be quite a bit redder, but it's grown on me and I think it suits my complexion.  That's quite a relief because I have 6 more yards of the stuff  (it was $1.99 and I had big plans)!  There are some drawbacks, which, I suppose, is one of the dangers of using $1.99 fabric.  The main one is that it's bagged at the back already, and the hem now looks sort of puckered or something.  This bugs me because I interfaced the hem and reinforced the CB seam with Hug Snug.

Anyway, I made View B, but with the shorter sleeves of View A.  I don't usually use directions, but found that it was necessary in order to understand just how the collar and its facing went together.  Don't be alarmed, though!  These directions, while not illustrated as fully as a pattern from, say, Simplicity or Vogue, gave me only the mildest of headaches.


These buttons are non-functional.  Don't care.  YOLO.


You can see here that the collar is buckling a little.  I'm not sure how to fix this, because only the facing is interfaced.  You can also see the extreme wrinkling that this fabric is prone to.


See that hem?  GRRR.


The dress itself is comfortable and very pretty.  I did my usual princess seam adjustment, where I just follow the curves of my princess seam block and it all came together.  The back was pretty big, but that was easy to adjust because of the center seam.  For the second version, I just cut the back one size smaller, grading out to the original size in the hips.

I like the sleeves, but I'm not in love with them.  I think they're cuter on the model than they are on me, and they have a habit of bunching up under a sweater, which added to the wrinkling makes me a little crazy, but I'm not going to change them.  They went right into the armscye with very little ease, which is nice.  I also love the high armhole and the shoulder seams which are actually on my shoulders!

The insides are pretty basic, I just pinked all the seams (this stuff is so dense--it does not ravel!) and narrow-zig-zagged the facing.

I definitely think I may make this a third time, just because it fits so well with minimal adjustments, and because its so customizable.  I think a version with LOTR Elvish-style embroidery around the collar would be really beautiful, or a dark version with hand topstitching tracing the seamlines, or colorblocked no, wait, that would be horrible.

I hate colorblocking.

Stay tuned for version 2!

Thursday, December 11, 2014

BurdaStyle

I subscribed to BurdaStyle magazine earlier this year.  After months of looking at the website and reviews on SewSkateRead, the April issue is what finally did it.  Of course, May was my first issue, but I didn't let that stop me!  I'm very happy that I decided to subscribe, especially after eyeing back issues on eBay for upwards of $20 each.

The upfront cost for an American subscriber is $90, which sounds a bit steep until you work out that it breaks down to $7.50 per issue, and each issue has at least a dozen distinct patterns which have their own variations.  There is the cost of tracing paper and storage solution (I use 6x8" manila envelopes), but that's not too much.  The tracing paper I use is this one.  This paper does have its drawbacks; it's not super wide, so some larger pattern pieces have to be pieced, and the paper is quite thin and fragile.  However, there's a certain sense of liberation that comes from a combination of the seemingly endless roll of paper and sweet, sweet price--you're not worried about wasting any of it, so experimentation is painless!


To get started, I got an enormous box of manila envelopes at Staples which I'm steadily working my way through.  Tracing is like an actual event for me.  Very soon after receiving my magazine in the mail, I set aside an evening to just trace everything that I think I might make soon, which means only the garments for which I have suitable fabric.  This way, I can really get into the pattern-sheet-deciphering-zone!  It's like a tunnel vision where I can only see the color and line I need, while filtering out all the other pieces.  The first time I glanced at the pattern sheets, I thought there was no way I come out of this not a lunatic, but I underestimated the mind's ability to focus.  It's a wonderful machine!  Here is something I made up over the summer:  #119 from Burdastyle July 2014.

It's kind of a crappy picture, but I haven't been documenting anything I sew for a long time.  From here on out, I'll be doing better.  Anyway, this is at the Lama Temple in Beijing.


I used a sheer rayon polka-dot georgette from Denver Fabrics.  Say what you want about slow shipping, color discrepancies, and those tiny-ass pictures, but DF is my ride-or-die.  Each Tuesday before I can even think about rolling out of my cat-bed-cocoon, I check out their sale page.  And each Tuesday my second thought is: "hmm.  Wonder what they've got going on next week."

Anyway, I liked this dress because apart from the bodice, it's all just rectangles.  Even the bodice is rectangles with ostensible armhole shaping.  It lends a certain air of uncomplicated breeziness I find irresistible in a summer dress.  And then cinch like I'm trying to restrict blood from flowing to my lower extremities. 

Plus it's a lot less tracing!  You just get the measurements and start tearing (if you've got that nice, obliging kind of fabric).

Post #1

Hello!

Anyone reading this may recall that I once had a (very inconsequential) blog where I posted pictures of my beginner projects.  After a few more years' intermittent practice, I think my skills have improved enough to warrant showing off a little!  I feel strange announcing to people that I've made whichever garment they're admiring, so I don't really get to show off in real life, but the internet and its illusion of anonymity help mitigate that self-centered feeling.

I'm also convinced that I have a knack for choosing unpopular patterns, so others may appreciate seeing a version all made up.